Spec & Prompt Management
for LLMs

Manage scattered project specifications and prompts in one place.
Accelerate your workflow with VS Code-style viewer and one-click copy.

Built with TDD Docker Ready Real-time Sync

New AI Workflow

Stop wasting time finding specs and prompts. Focus on creating.

The Pain Points

  • • Switching between multiple VS Code windows to check specs
  • • Frequent prompts scattered across Notion, Notes, etc.
  • • Tedious copying of file contents for every LLM context injection

DocBridge Solution

  • • Manage specs and prompt files (.md) in one unified view
  • • Familiar tree UI and markdown rendering like VS Code
  • Watchdog & WebSocket for instant updates on save
DocBridge - Multi-Project Spec Viewer
EXPLORER
Project A
spec
auth.md
user.md
Project B
Copy
POST /api/auth/login
{ "email": "..." }

Powered By

Next.js
FastAPI
Docker
SQLite

Key Features (MVP)

Designed with Developer Experience (DX) as the top priority.

Flexible Folder Reg.

Register multiple local project paths freely. Integrate not only `spec` folders but also your prompt library.

Real-time Watchdog

Changes are reflected in the viewer instantly via WebSocket upon save. Check the latest specs without refreshing.

LLM-Optimized Viewer

With PrismJS syntax highlighting and one-click full copy, deliver specs to ChatGPT, Claude, etc., faster than ever.

Quick Installation

Choose the method that fits your environment.

Docker (Recommended)

1. Download Project (Required)

Step 1. Download config files

# Create directory & move
mkdir docbridge && cd docbridge

# Download config files
curl -o docker-compose.yml https://raw.githubusercontent.com/jih4855/DocBridge/main/docker-compose.deploy.yml
curl -o .env https://raw.githubusercontent.com/jih4855/DocBridge/main/.env.example

2. Configuration (Required)

Step 1. Setup .env

Open downloaded .env file and edit configuration.
# .env file content (example)
PROJECT_ROOT=/Users/path/to/my-projects
NEXT_PUBLIC_API_URL=http://localhost:8000
NEXT_PUBLIC_WS_URL=ws://localhost:8000
WATCHDOG_USE_POLLING=true

Step 2. Set PROJECT_ROOT

💡 Tip: Using a parent folder (e.g., Documents) containing multiple projects or MD files allows you to manage them all at once.

# Mac/Linux Example
PROJECT_ROOT=/Users/john/Documents
# Windows Example
PROJECT_ROOT=C:\Users\john\Documents\Projects

3. Download Images (Optional)

Step 1. Pull latest version

Download pre-built latest version without building locally.

docker-compose pull

4. Run

Step 1. Run in background

Use -d option to keep server running after closing terminal.

docker-compose up -d

Local Setup

1. Download Project (Required)

Step 1. Clone Repository

git clone https://github.com/jih4855/DocBridge.git
cd DocBridge

2. Configuration (Required)

Step 1. Create .env

cp .env.example .env
Or copy content directly:
# .env file content
PROJECT_ROOT=/Users/path/to/my-projects
NEXT_PUBLIC_API_URL=http://localhost:8000
NEXT_PUBLIC_WS_URL=ws://localhost:8000
WATCHDOG_USE_POLLING=false
* For local execution, WATCHDOG_USE_POLLING=false is more efficient.

Step 2. Set PROJECT_ROOT

💡 Tip: Using a parent folder (e.g., Documents) containing multiple projects or MD files allows you to manage them all at once.

# Mac/Linux Example
PROJECT_ROOT=/Users/john/Documents
# Windows Example
PROJECT_ROOT=C:\Users\john\Documents\Projects

3. Backend Setup

Step 1. Virtual Env & Install

cd backend
python -m venv venv
# Mac/Linux
source venv/bin/activate
# Windows
venv\Scripts\activate
pip install -r requirements.txt

Step 2. Run Server

uvicorn main:app --reload

4. Frontend Setup

Step 1. Install Packages

cd frontend
npm install

Step 2. Run Dev Server

npm run dev

Access URL after installation: http://localhost:3000

How to Use

Manage specs with an intuitive workflow.

DocBridge Dashboard
01.

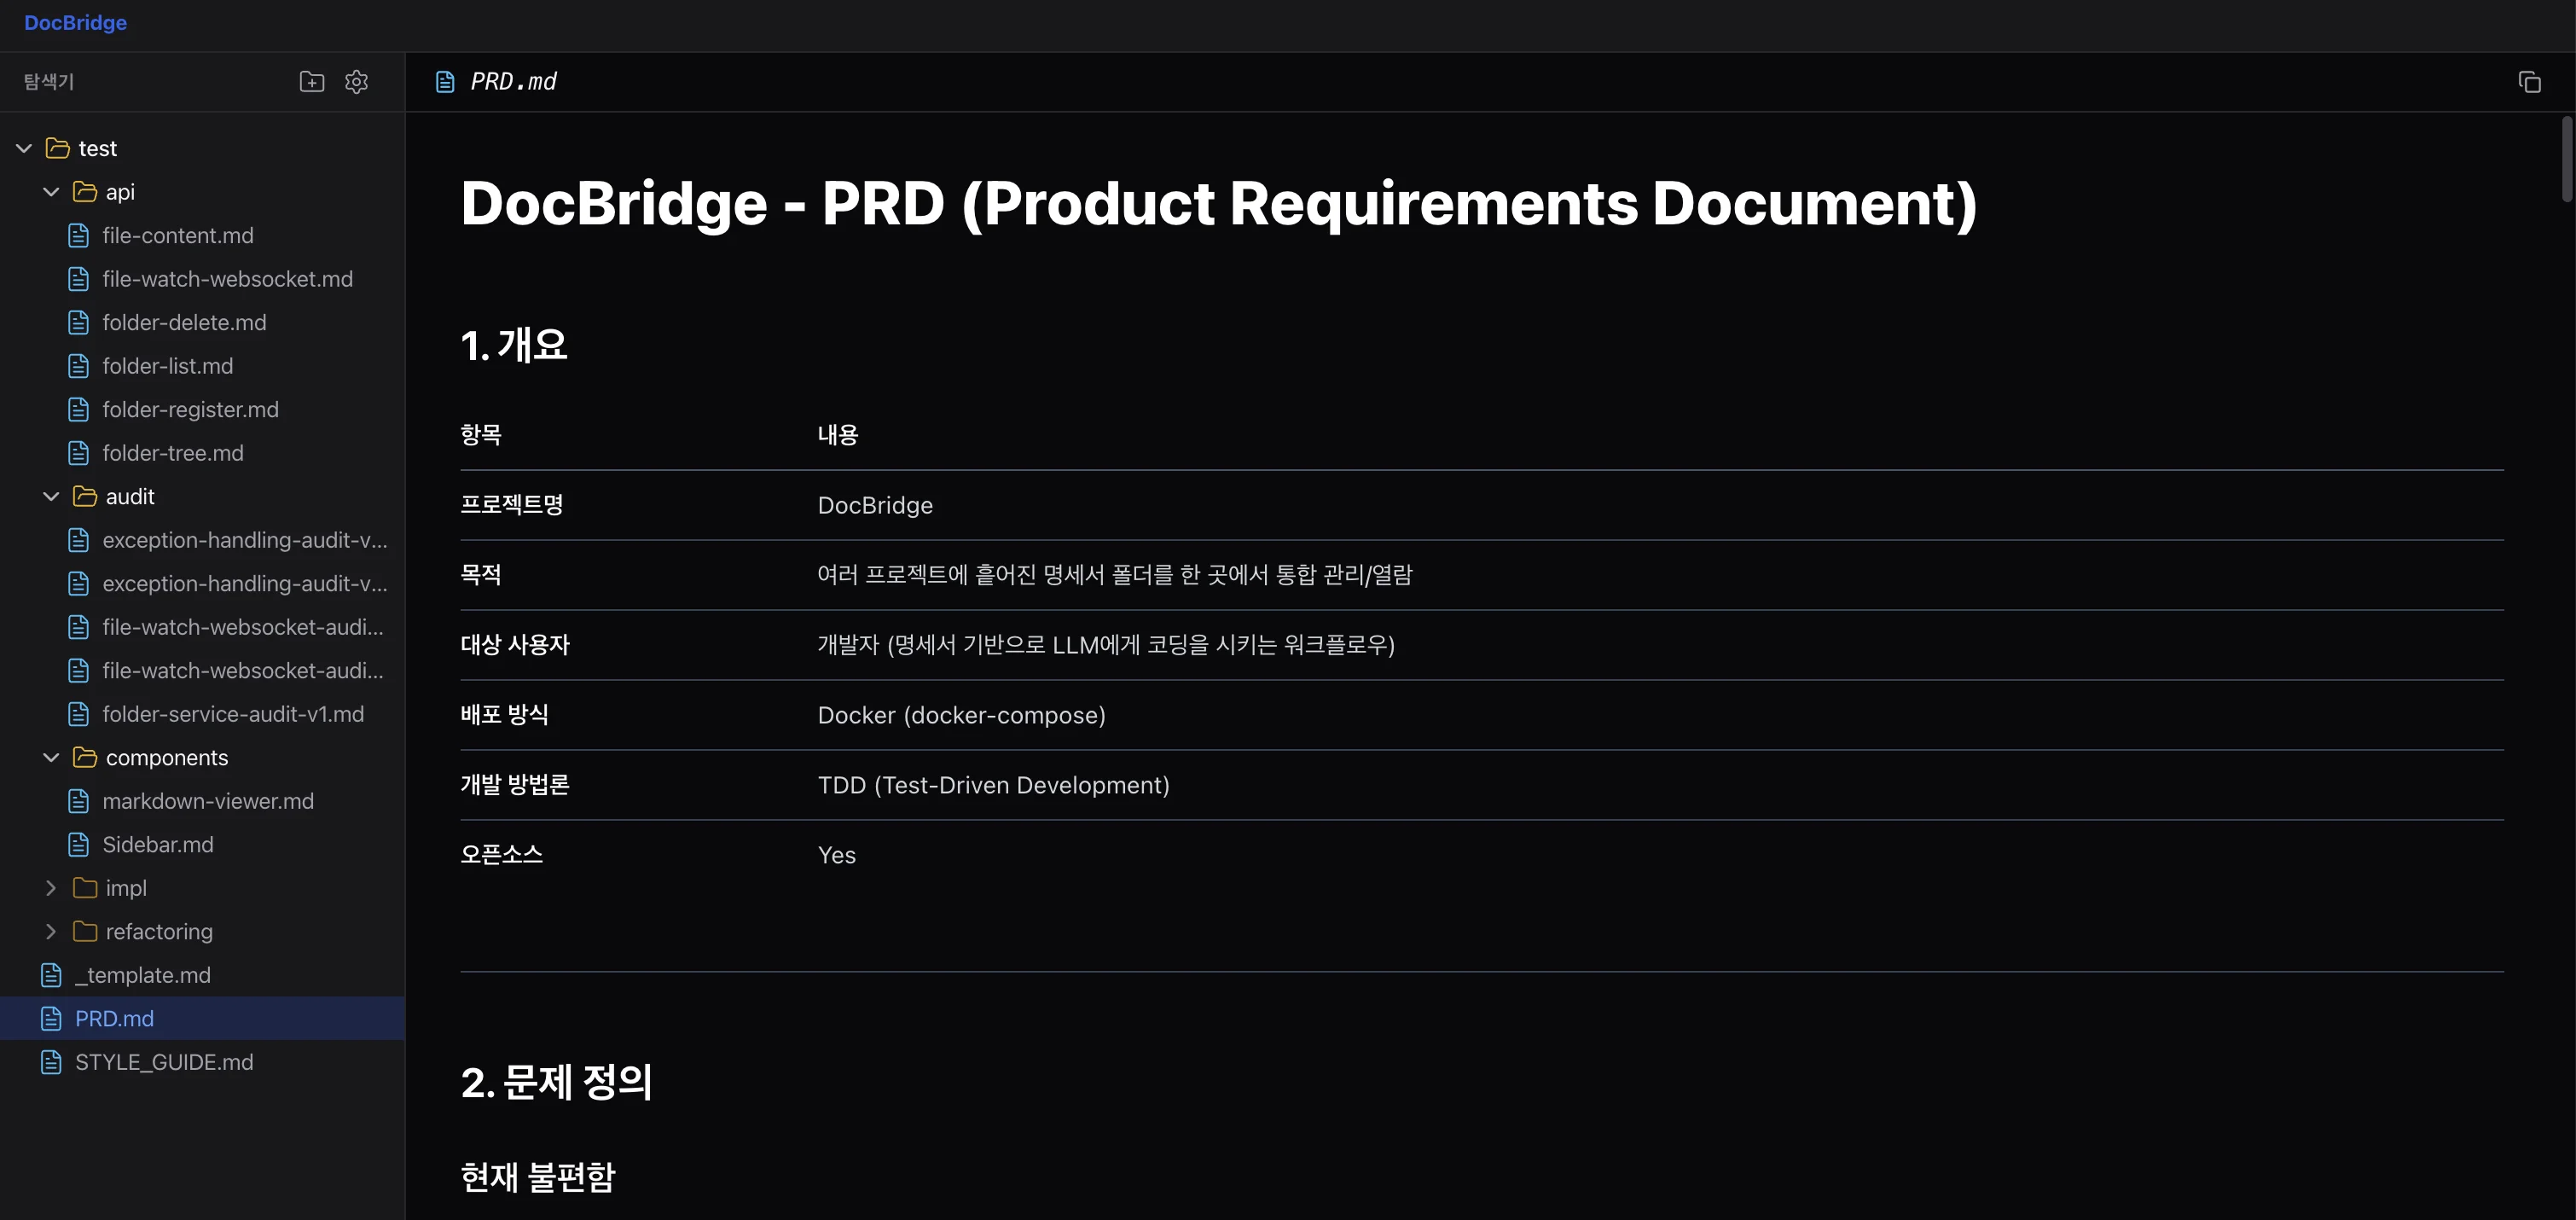
Register Project Folder

Click [+ Register] button and enter project name and path starting with `/data/`.

02.

Tree Navigation

Expand registered projects in the sidebar to find spec files.

03.

Copy Content

Click the file and use the [Copy] button on top right to paste into LLM chat.